OAuth
Setting Up Xero OAuth App
Complete guide to creating and configuring a Xero OAuth application
Prerequisites
- Xero account (personal or business)
- Access to Xero Developer Portal
Step 1: Create Xero Developer Account
- Visit https://developer.xero.com/
- Click “Get started for free” or “Login” if you already have an account
- Sign in with your Xero account or create a new developer account
Step 2: Create a New App
- Once logged in, go to your developer dashboard
- Click “New app” or “Create an app”
- Choose “Web App” as the integration type
- Fill in the app details:
- App name: Your application name (e.g., your brand name)
- Company or application URL: Your company website
- Privacy policy URL: Your privacy policy URL
- Terms of service URL: Your terms of service URL
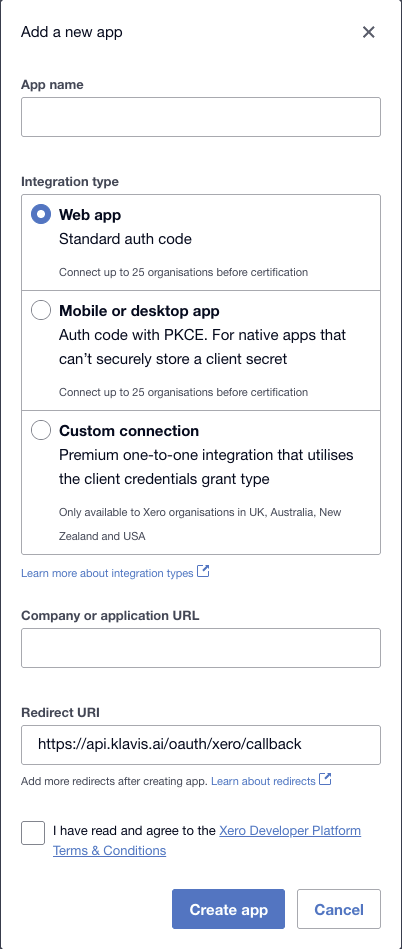
Normally, the redirect URI should be set to:
https://api.klavis.ai/oauth/xero/callbackStep 3: Configure OAuth Settings
Klavis Xero MCP Server uses the following OAuth scopes:
accounting.transactions.read accounting.transactions offline_access-
Redirect URIs: Add your callback URL:
https://api.klavis.ai/oauth/xero/callback
-
Scopes: Select the scopes your application needs:
offline_access(required for refresh tokens)accounting.transactions.read(for reading transaction data)accounting.transactions(for transaction operations)- Add any additional scopes based on your needs
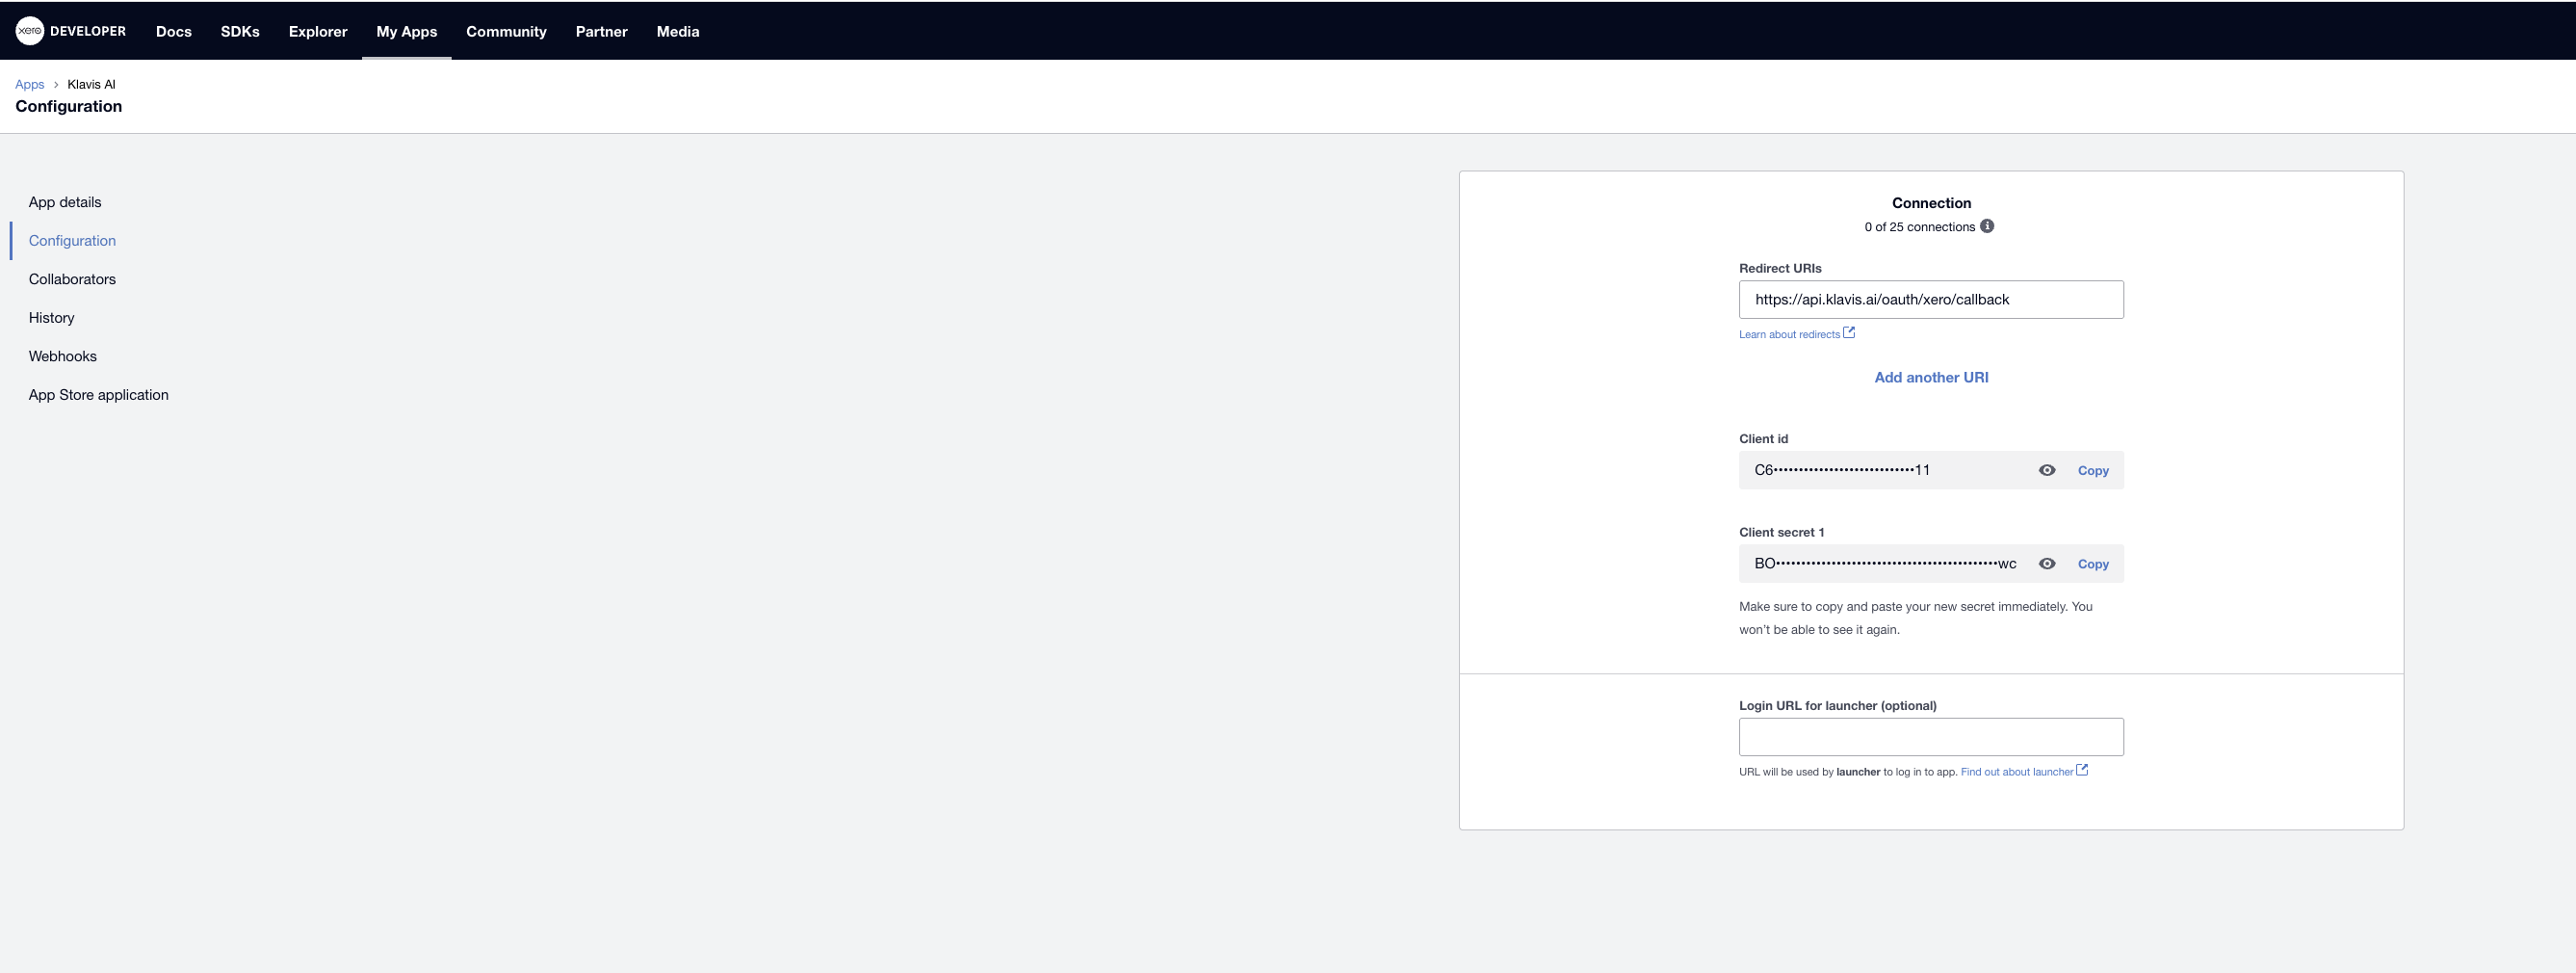
You can connect up to 25 organisations to uncertified apps. Read more about uncertified app limits.
Step 4: Get Your Credentials
After creating the app, you’ll see:- Client ID: Copy this value
- Client Secret: Generate and copy this value (keep it secure!)
You have successfully created a Xero OAuth application! You now have your Client ID and Client Secret ready for integration with Klavis AI.
Xero Token Expiration
- Access Tokens: Expire after 30 minutes
- Refresh Tokens: Expire after 60 days (rolling expiration - resets when used)
Klavis handles all token management automatically - we refresh your tokens before they expire so you maintain seamless access to your Xero data without any interruption.
(Optional) Step 5: White Labeling
White labeling allows you to customize the OAuth experience with your own branding instead of Klavis AI’s.
- Configure White Labeling: Go to https://www.klavis.ai/home/white-label
- Add Your Credentials: Enter your Xero Client ID and Client Secret from Step 4
- Set Redirect URI: Use
https://api.klavis.ai/oauth/xero/callbackor your custom callback URL - Initiate OAuth: Use your client ID when starting the OAuth flow:
For detailed white labeling implementation and code examples, see our OAuth & White Labeling guide.