OAuth Apps
Setting Up Dropbox OAuth App
Complete guide to creating and configuring a Dropbox OAuth application
Prerequisites
- Dropbox account (personal or business)
- Access to Dropbox Developer Console
Step 1: Create Dropbox Developer Account & App
- Visit https://www.dropbox.com/developers and sign in with your Dropbox credentials
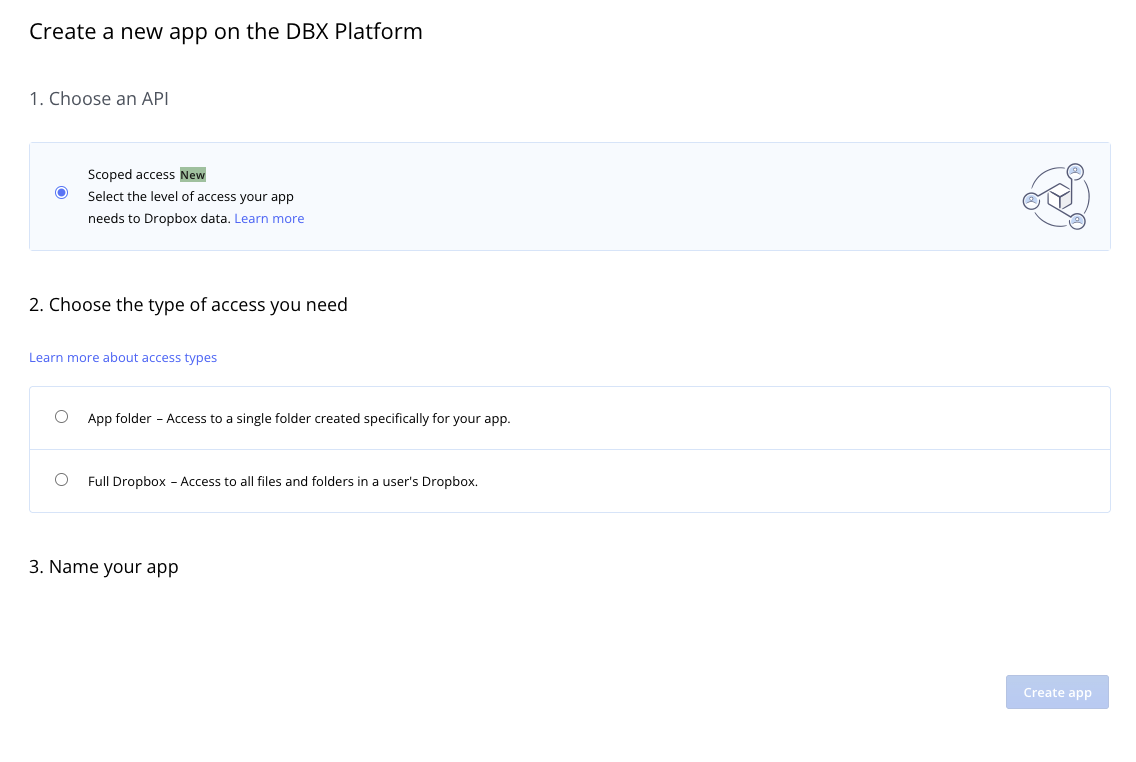
- Click “Create apps” and fill out the form:
- Choose an API: Select “Scoped access”
- Choose the type of access: Select “Full Dropbox” for complete access or “App folder” for restricted access
- Name your app: Choose a descriptive name for your application
- Choose the Dropbox account: Select your personal or business account
Step 2: Configure OAuth Settings
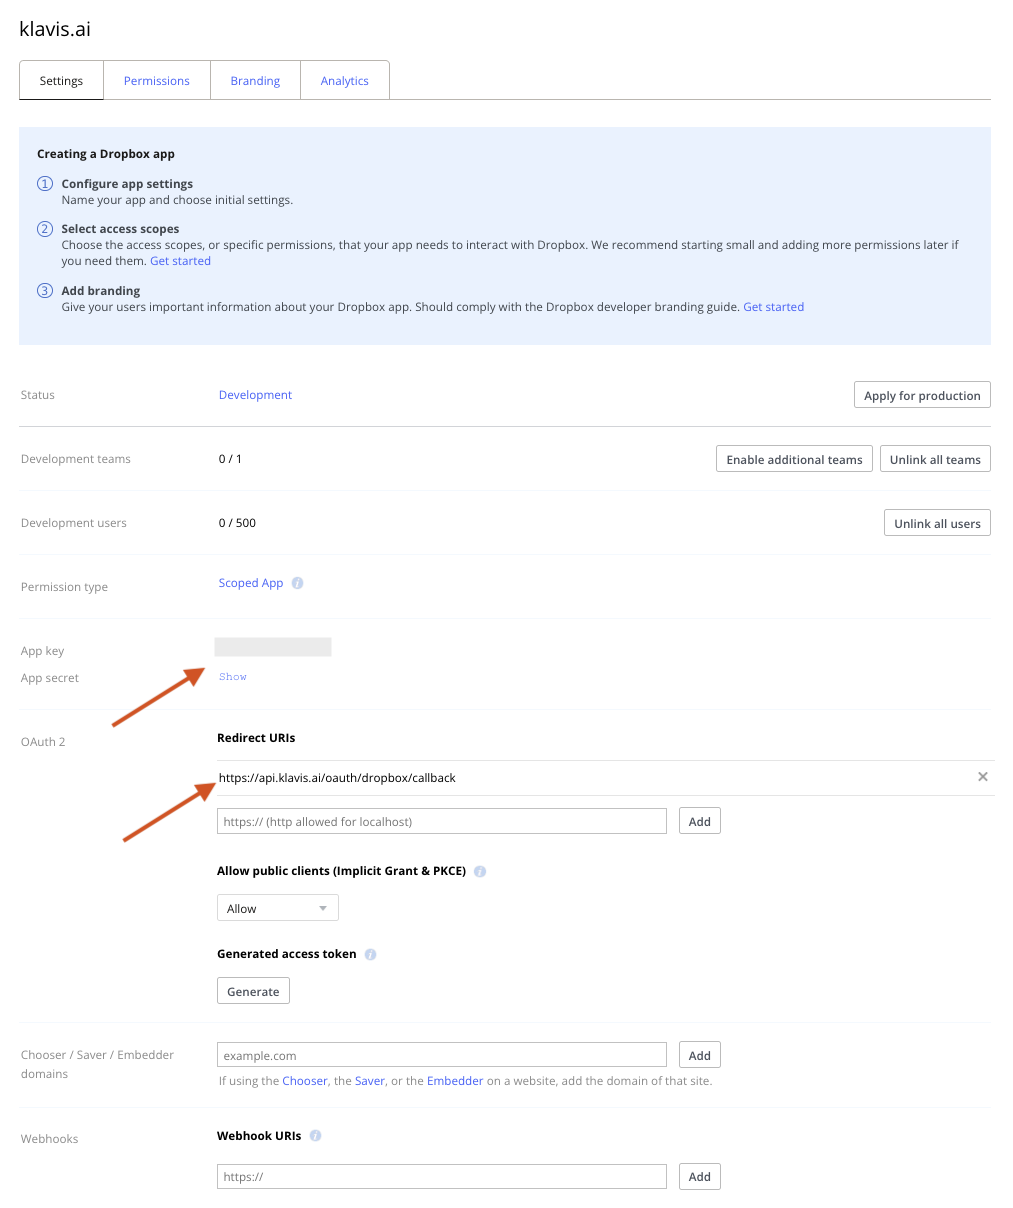
- After creating the app, you’ll be redirected to the app settings page
- In “OAuth 2” section, add redirect URLs:
https://api.klavis.ai/oauth/dropbox/callback
- Note your App key and App secret
Step 3: Set Required Permissions
Klavis Dropbox MCP Server uses the following OAuth scopes:
account_info.read files.metadata.read files.metadata.write files.content.read files.content.write file_requests.read file_requests.write sharing.read sharing.write contacts.read contacts.write- Go to the “Permissions” tab and configure the required permissions as shown in the screenshot below:
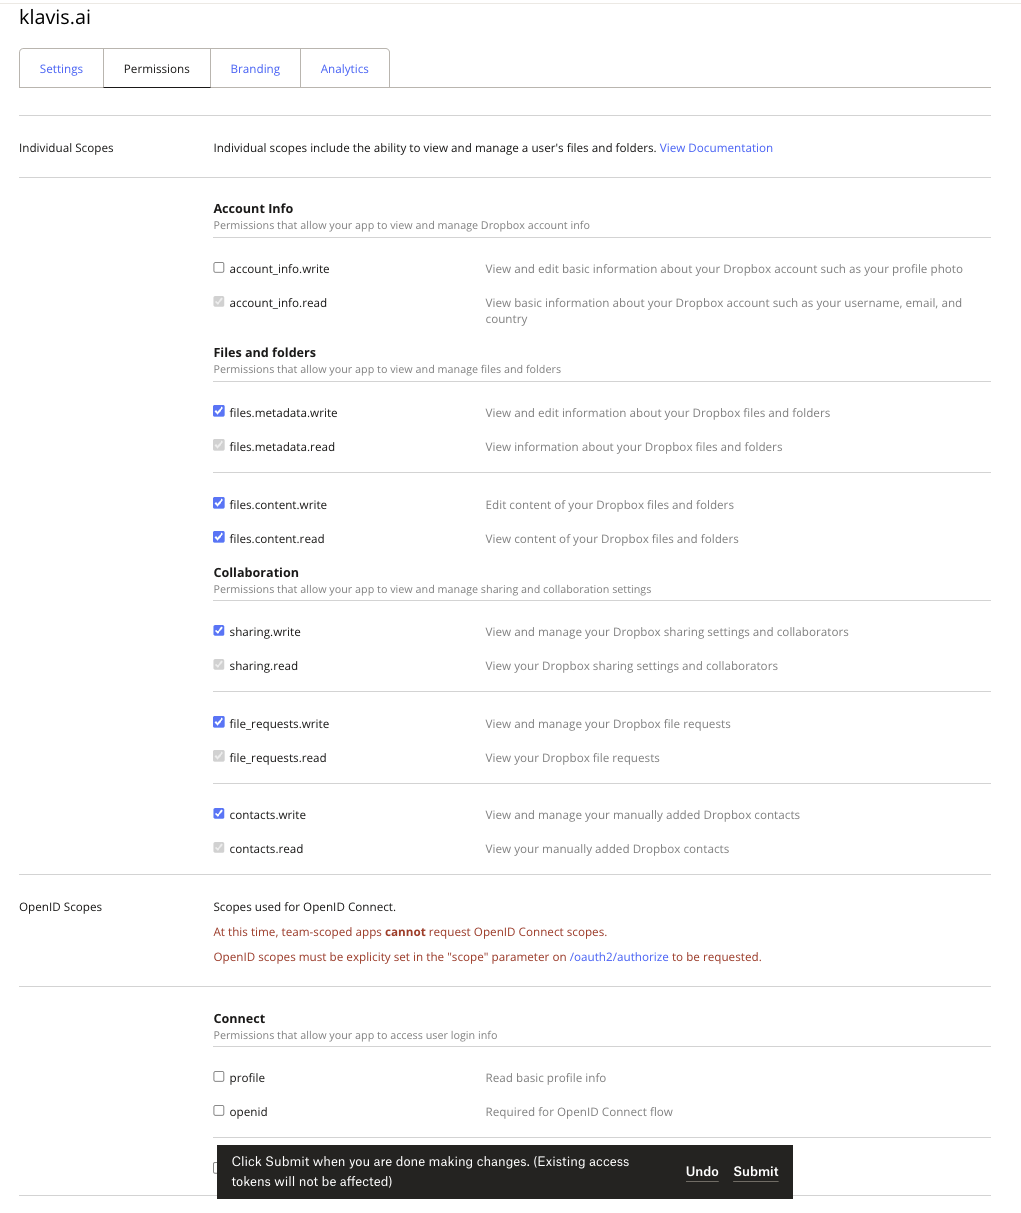
- Click “Submit” to save your permission settings
You have successfully created a Dropbox OAuth application! You now have your App Key and App Secret ready for integration with Klavis AI.
Klavis handles all token management automatically - we securely store and manage your tokens so you maintain seamless access to your Dropbox data without any interruption.
(Local Testing) Step 4: Generate Access Token
- In the “Settings” tab, scroll to the “OAuth 2” section
- Click “Generate” under “Generated access token”
- Copy and securely store the generated token
(Optional) Step 5: White Labeling
White labeling allows you to customize the OAuth experience with your own branding instead of Klavis AI’s.
- Configure White Labeling: Go to https://www.klavis.ai/home/white-label
- Add Your Credentials: Enter your Dropbox App Key and App Secret from Step 2
- Set Redirect URI: Use
https://api.klavis.ai/oauth/dropbox/callbackor your custom callback URL - Initiate OAuth: Use your client ID when starting the OAuth flow:
For detailed white labeling implementation and code examples, see our OAuth & White Labeling guide.