Prerequisites
- Discord account
- Access to Discord Developer Portal
Step 1: Create Discord Developer Account
- Visit https://discord.com/developers
- Click “Get Started” or “Login” if you already have an account
- Sign in with your Discord account or create a new developer account
Step 2: Create a New App
- Once logged in, go to “Applications” in your developer dashboard
- Click “New Application” to create a new app
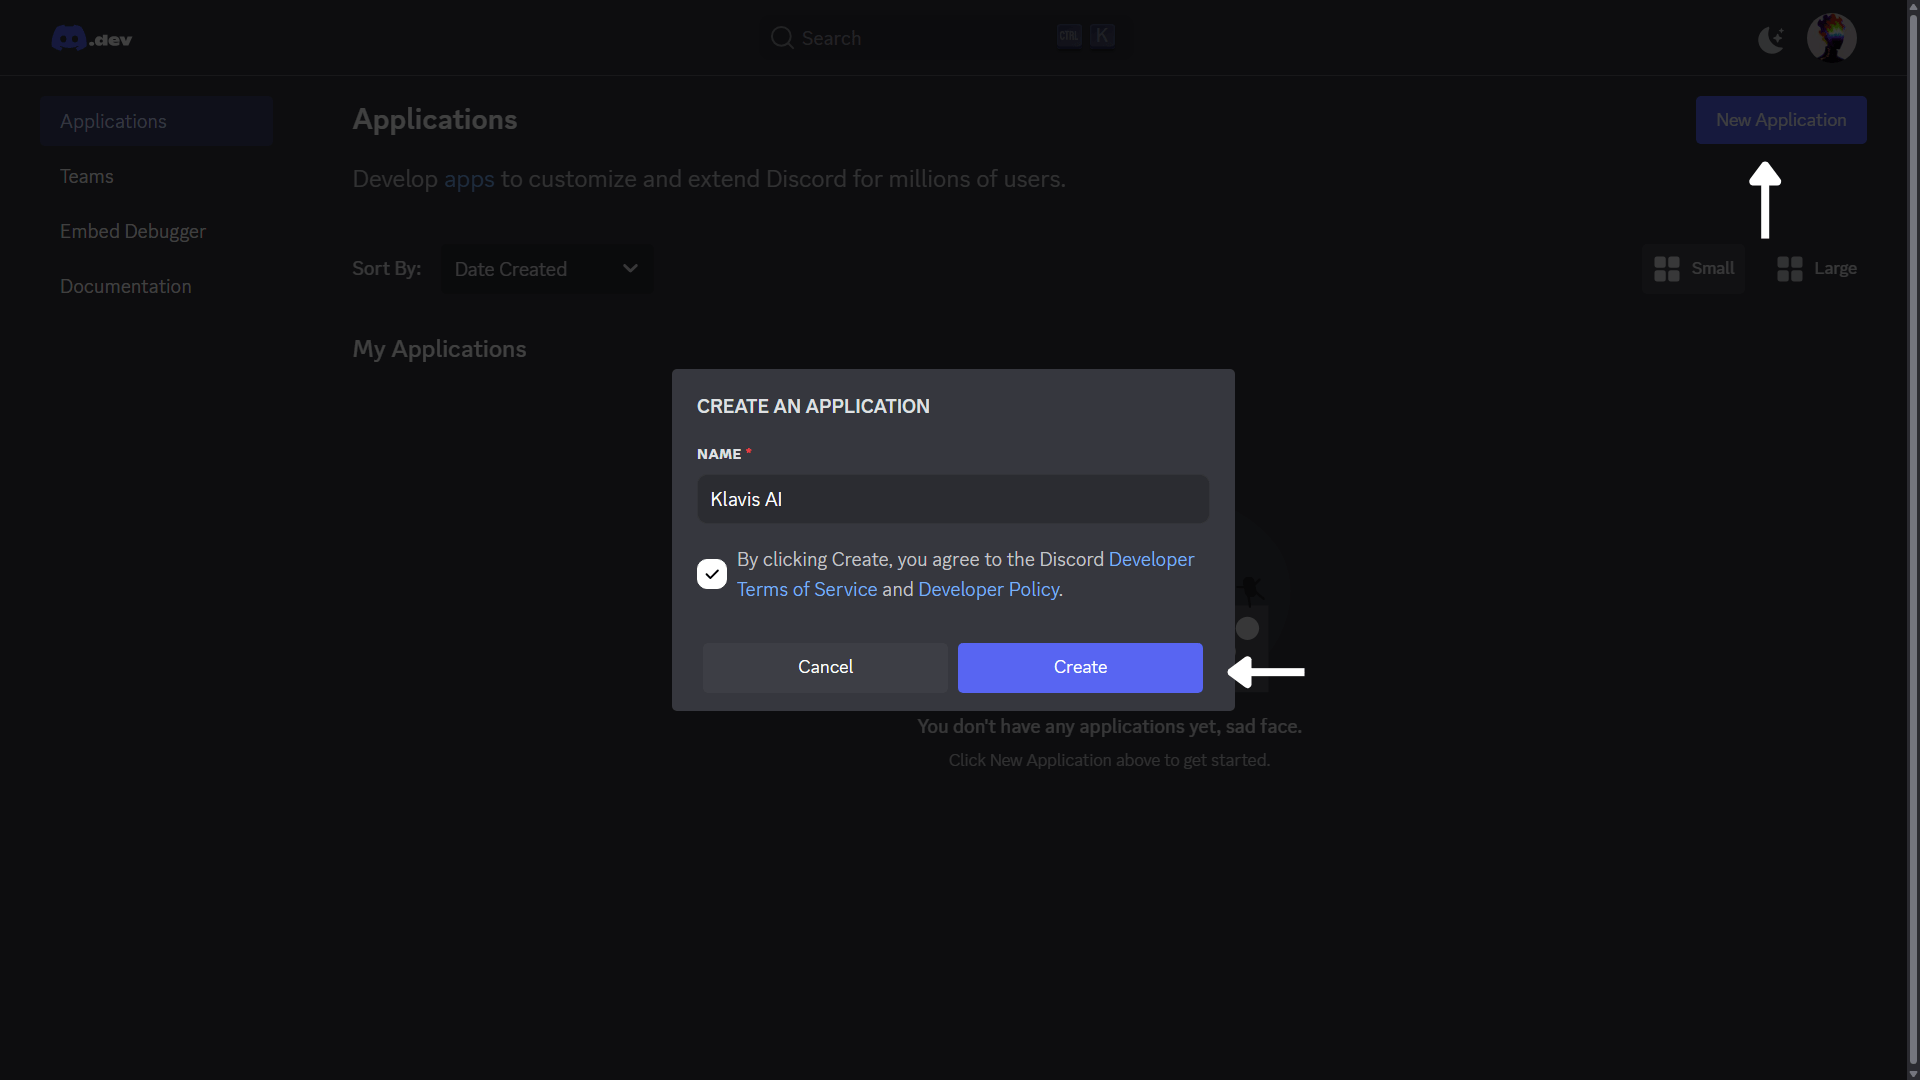
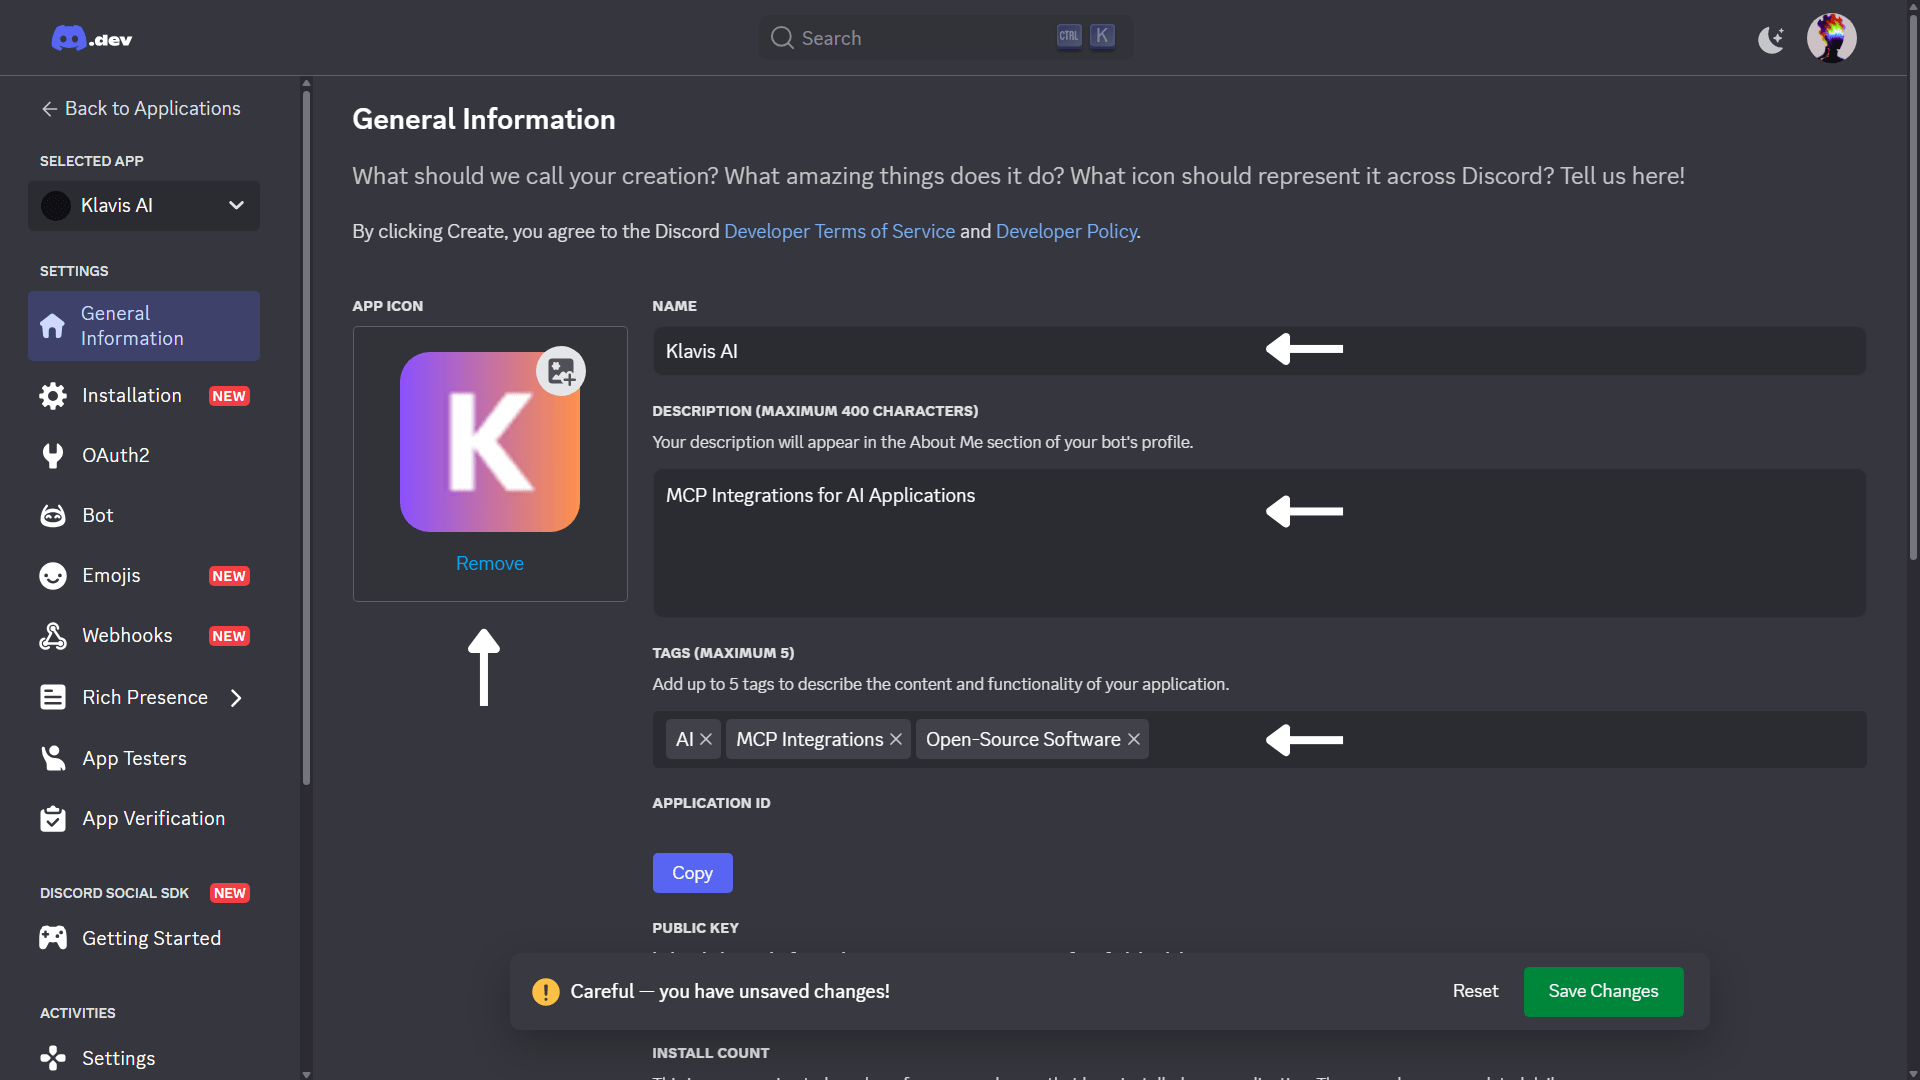
- Click on the “App” that you just created
- Go to “General Information” section
- Fill in the app details:
- App name: Your application name (e.g., your brand name)
- App description: Your application description
- “App Icon”: Upload 100x100px PNG (recommended)
- “Tags”: Add tags that describe your application
- Privacy policy URL: Your privacy policy URL
- Terms of service URL: Your terms of service URL
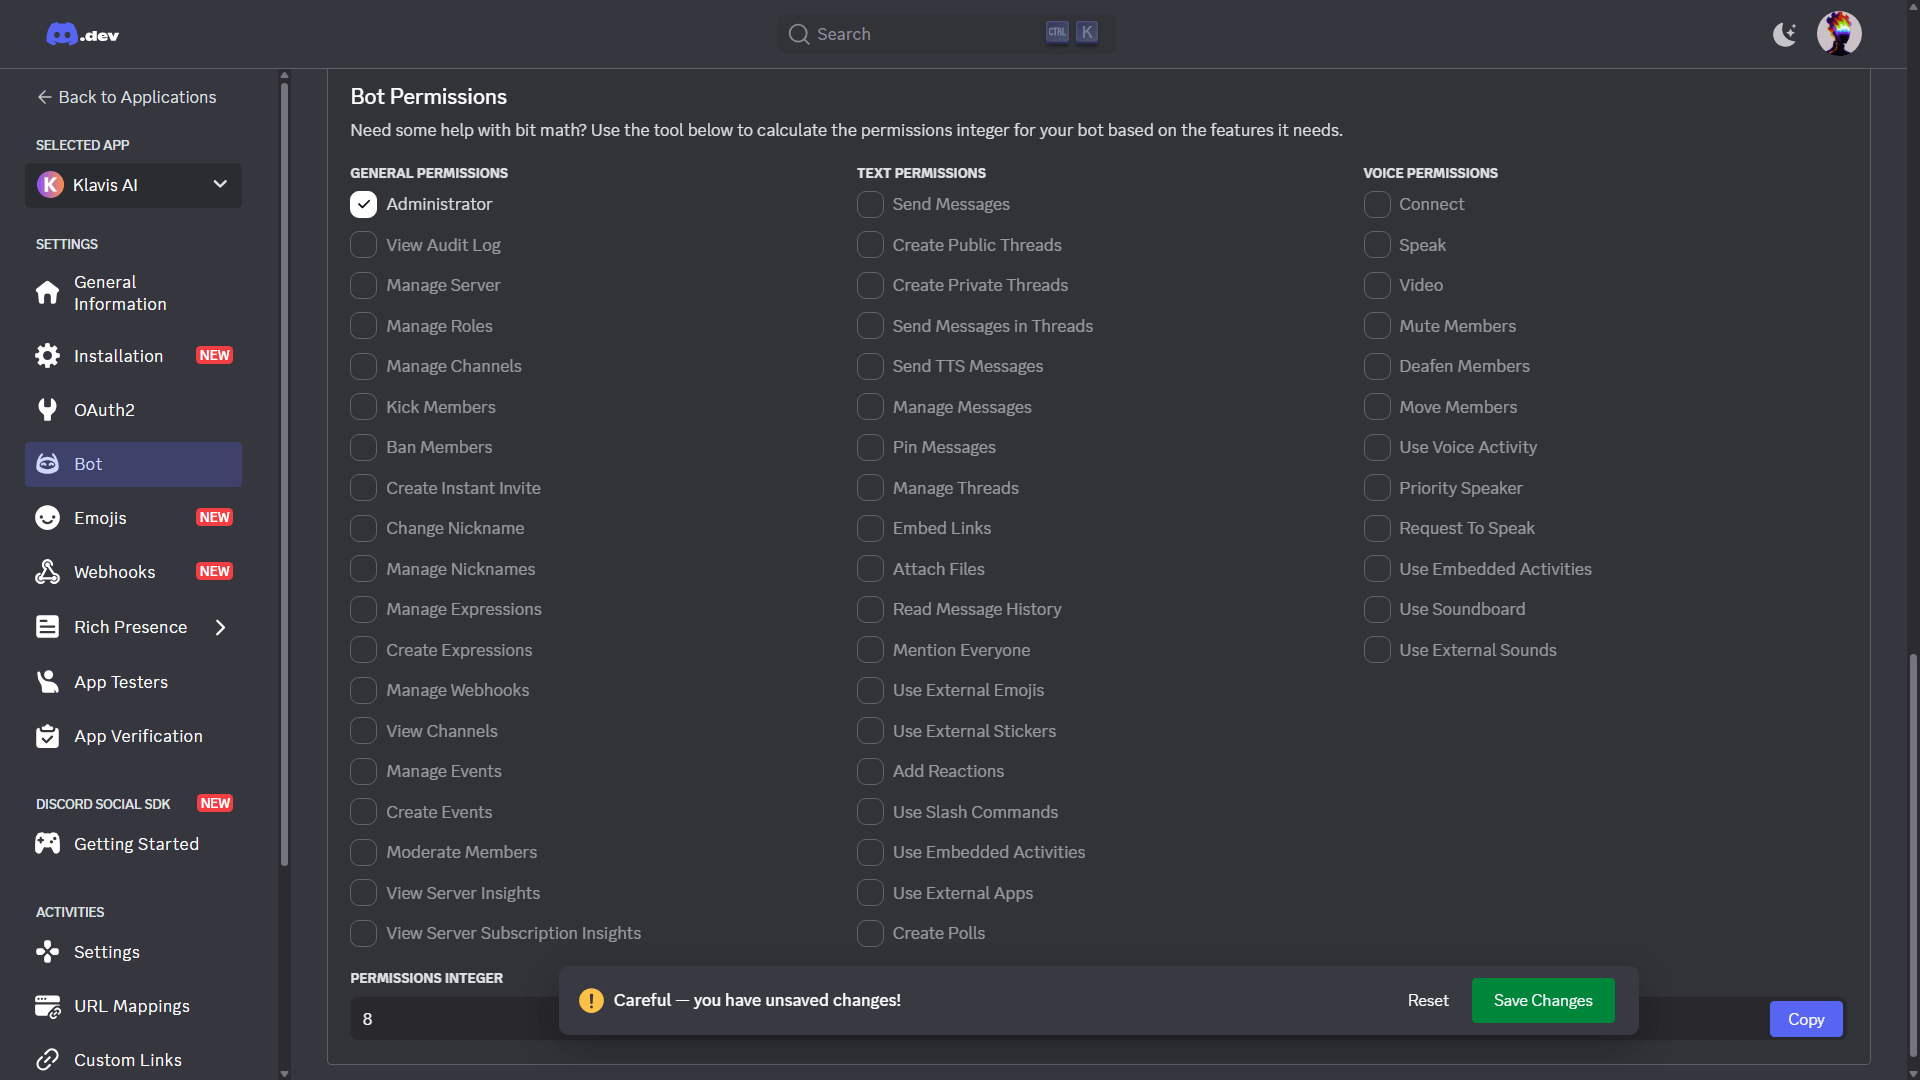
Step 3: Build A Bot
- Go to “Bot” section.
- Get Discord Token:
- Click on Reset Token button under TOKEN tab
- Enter your Discord Password and press Submit
- New Token has been generated
- Copy this token (keep it secure!)
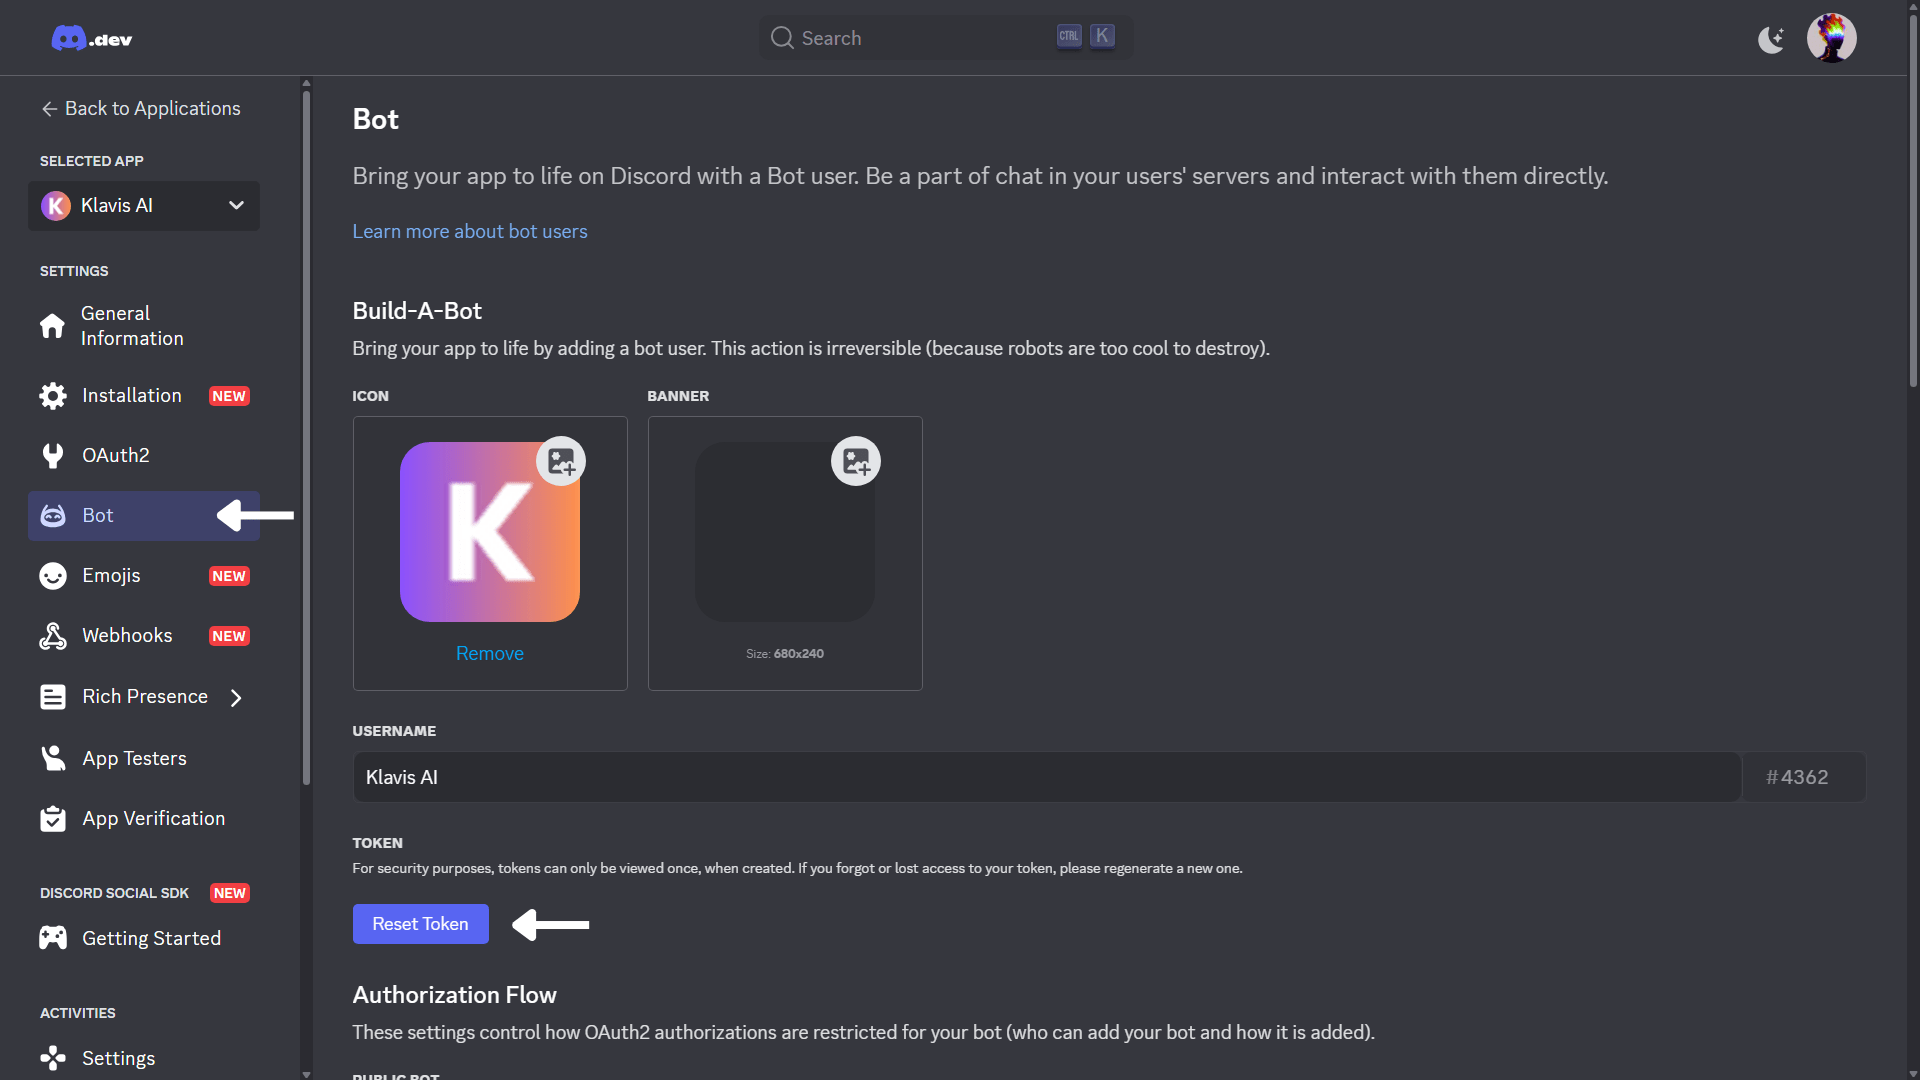
- Set Bot Permissions:
- Choose Administrator under General Permissions (recommended)
Klavis AI recommends to select required OAuth scopes only.
Step 4: Configure OAuth Settings
Navigate to “OAuth2”:- Client ID: Copy this value
- Client Secret: Generate and copy this value (keep it secure!)
- Redirect URI: Set as https://api.klavis.ai/oauth/discord/callback
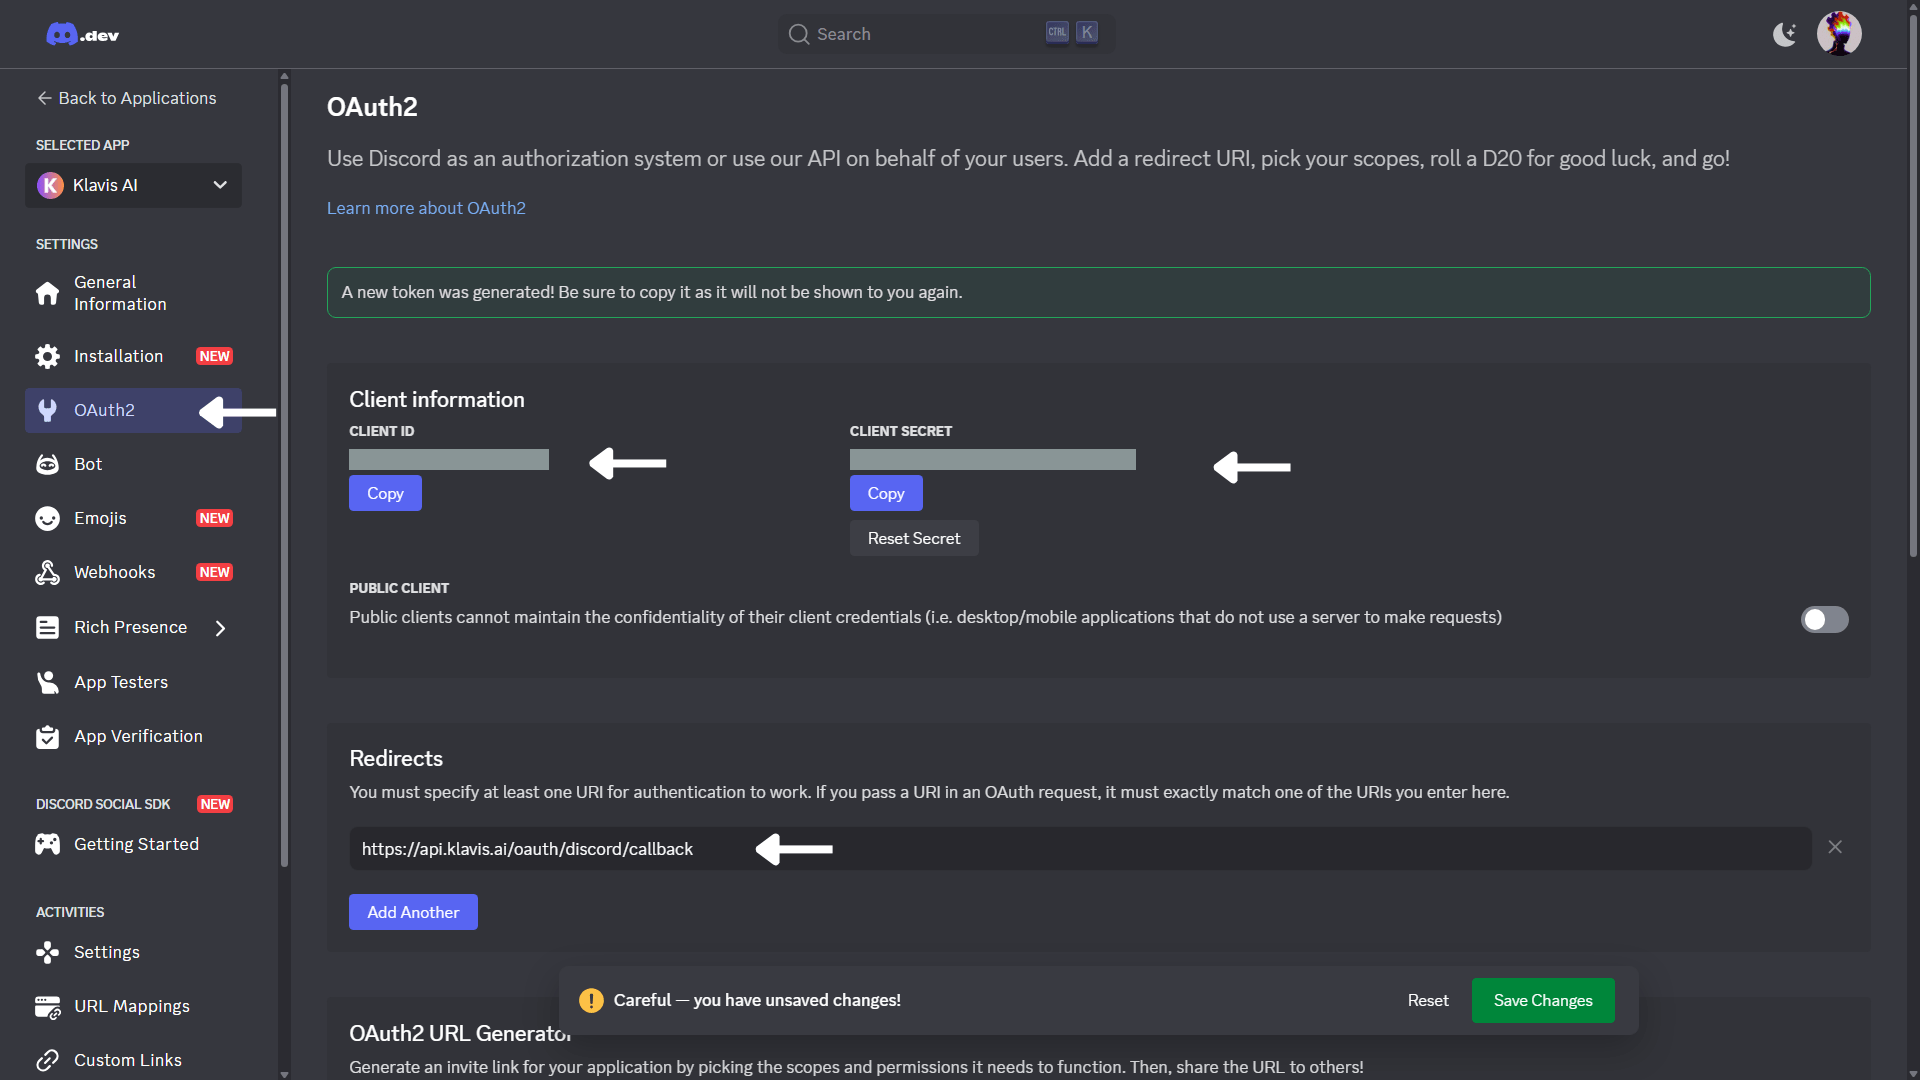
Normally, the redirect URI should be set to:
https://api.klavis.ai/oauth/discord/callbackStep 5: OAuth2 URL Generator
- Scroll to Scopes
- Select bot from the scopes list
- For Bot Permissions: select Administrator
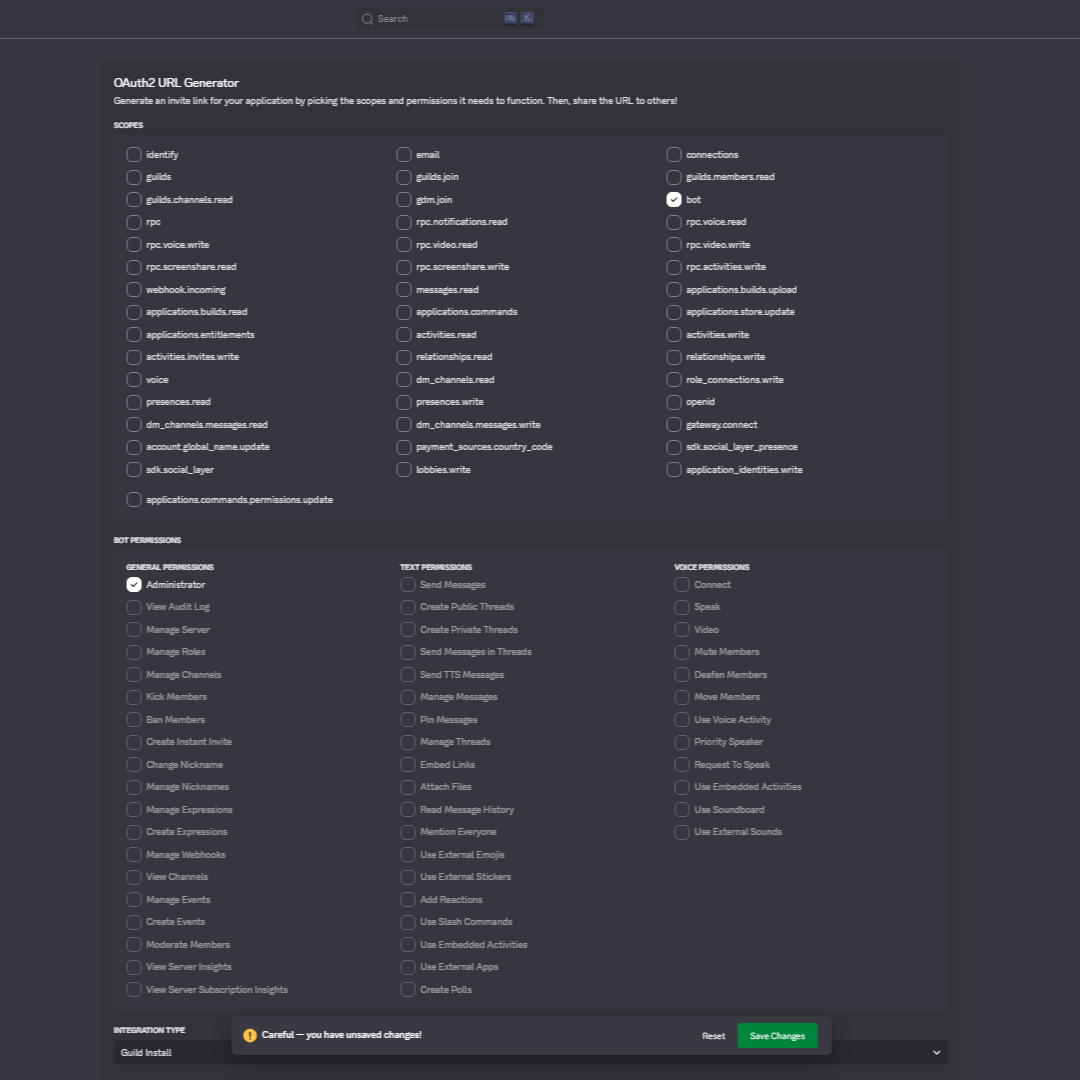
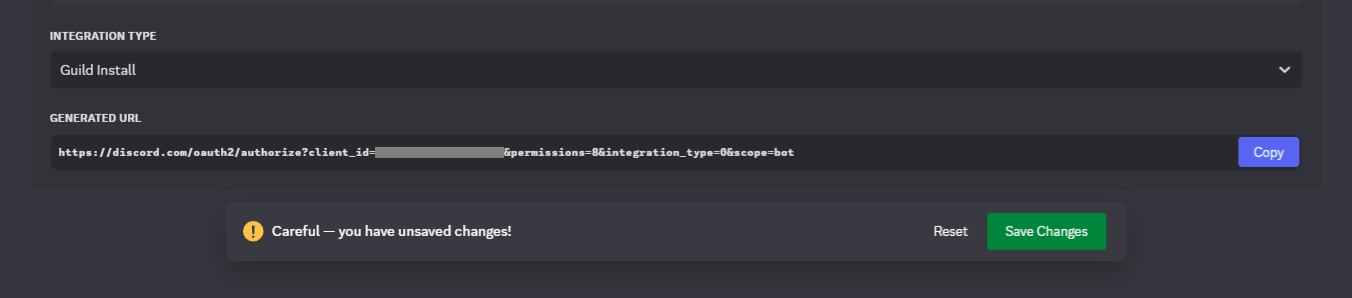
- Generate URL:
- Integration Type: Guild Install (recommended)
- Copy Generated URL and paste in browser to complete authentication
You have successfully created a Discord OAuth application! You now have your Client ID and Client Secret, and Discord Token ready for integration with Klavis AI.
(Optional) Step 6: White Labeling
White labeling allows you to customize the OAuth experience with your own branding instead of Klavis AI’s.
- Configure White Labeling: Go to https://www.klavis.ai/home/white-label
- Add Your Credentials: Enter your Discord Client ID and Client Secret from Step 4
-
Set Redirect URI: Use
https://api.klavis.ai/oauth/discord/callbackor your custom callback URL -
Initiate OAuth: Use your client ID when starting the OAuth flow:
For detailed white labeling implementation and code examples, see our OAuth & White Labeling guide.