Prerequisites
- Salesforce account (personal or business)
- Access to Salesforce Developer Portal
Step 1: Create Salesforce Developer Account
- Visit https://developer.salesforce.com/
- Click “Sign Up” or “Login” if you already have an account
- Sign in with your Salesforce account or create a new developer account
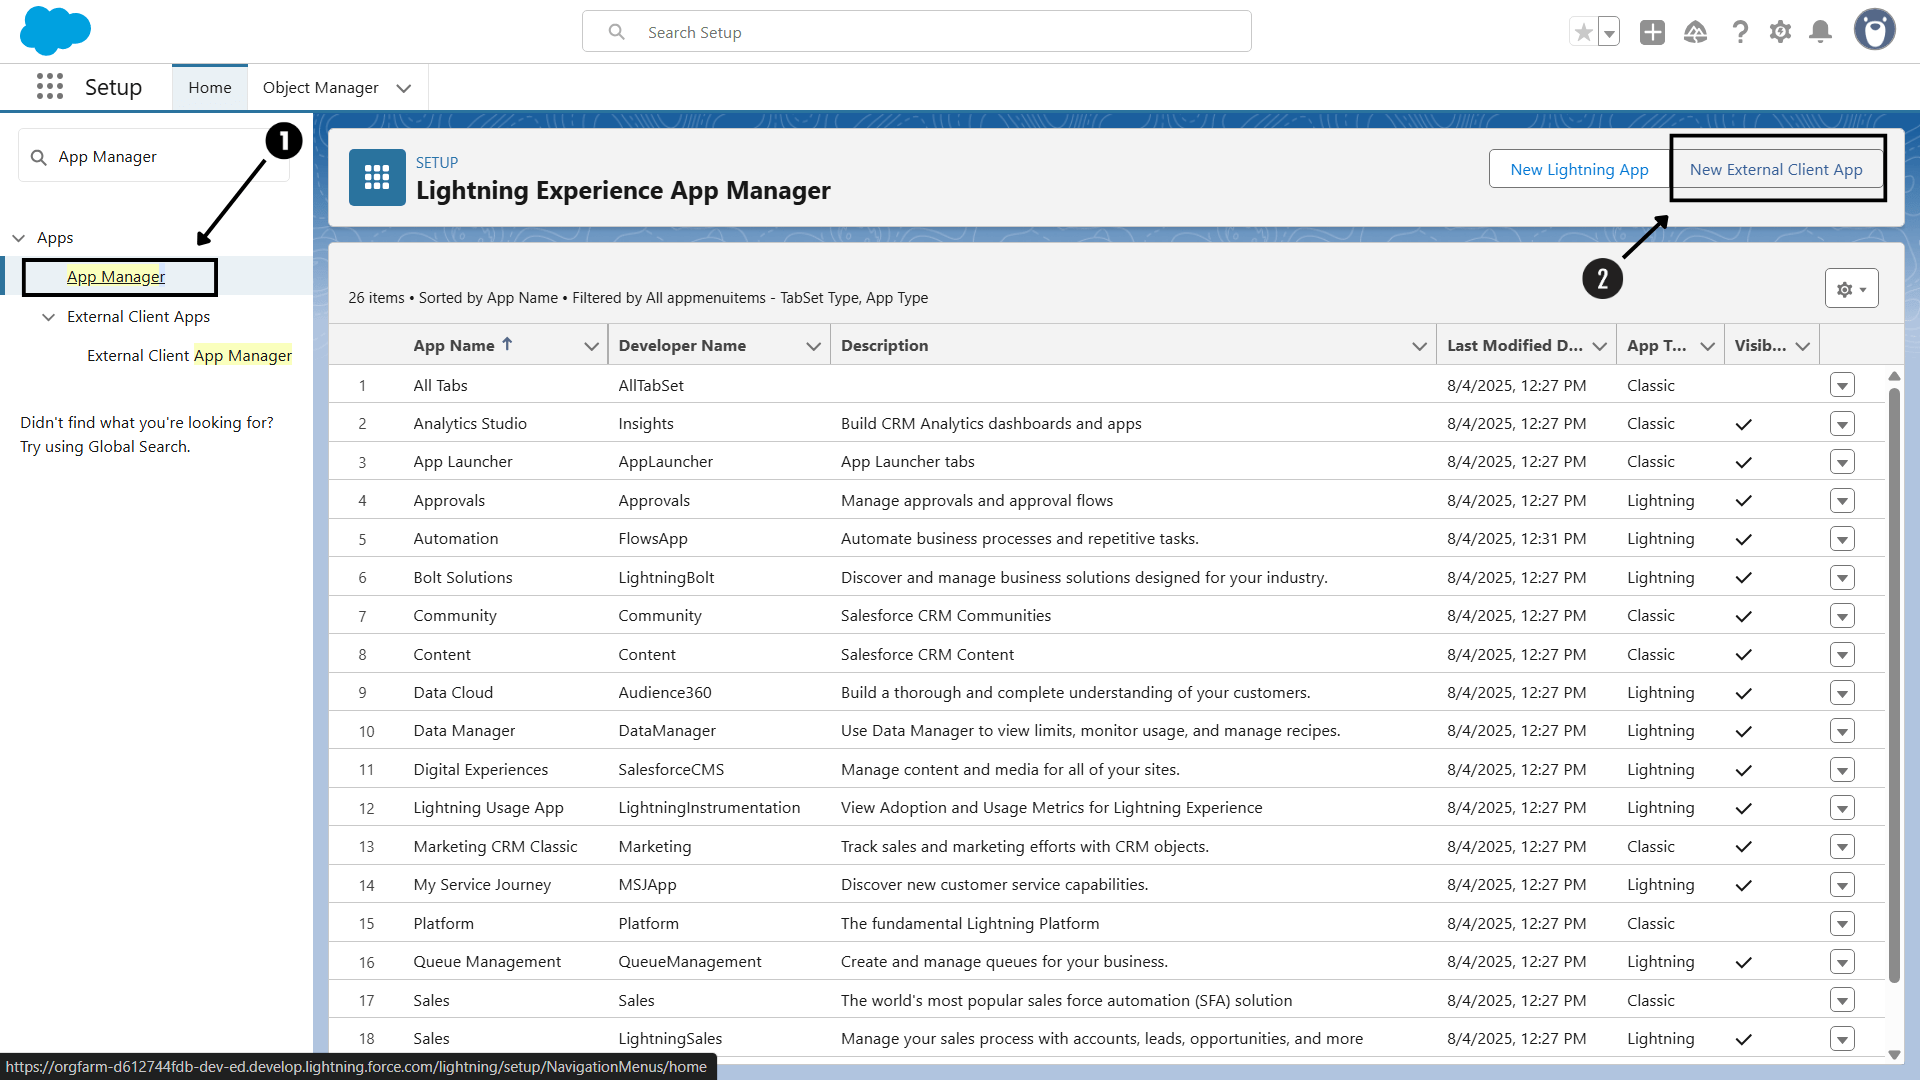
Step 2: Create a New App
- Once logged in, go to “Setup Menu” (Gear Icon) and click “Setup”
- Search “App Manager” in the “Quick Find” search box
- In “App Manager”, choose “New External Client App”
Step 3: Fill Basic App Information
-
Fill the necessary app details:
- App name: Your application name (e.g., your brand name)
- API Name: Your API Name (e.g similar to app name)
- Distribution State: Local/Packaged (recommended to set as Local)
- Other Information: Contact Mail, Contact Phone, Description, Info Url, Logo Image Url, and Icon Url

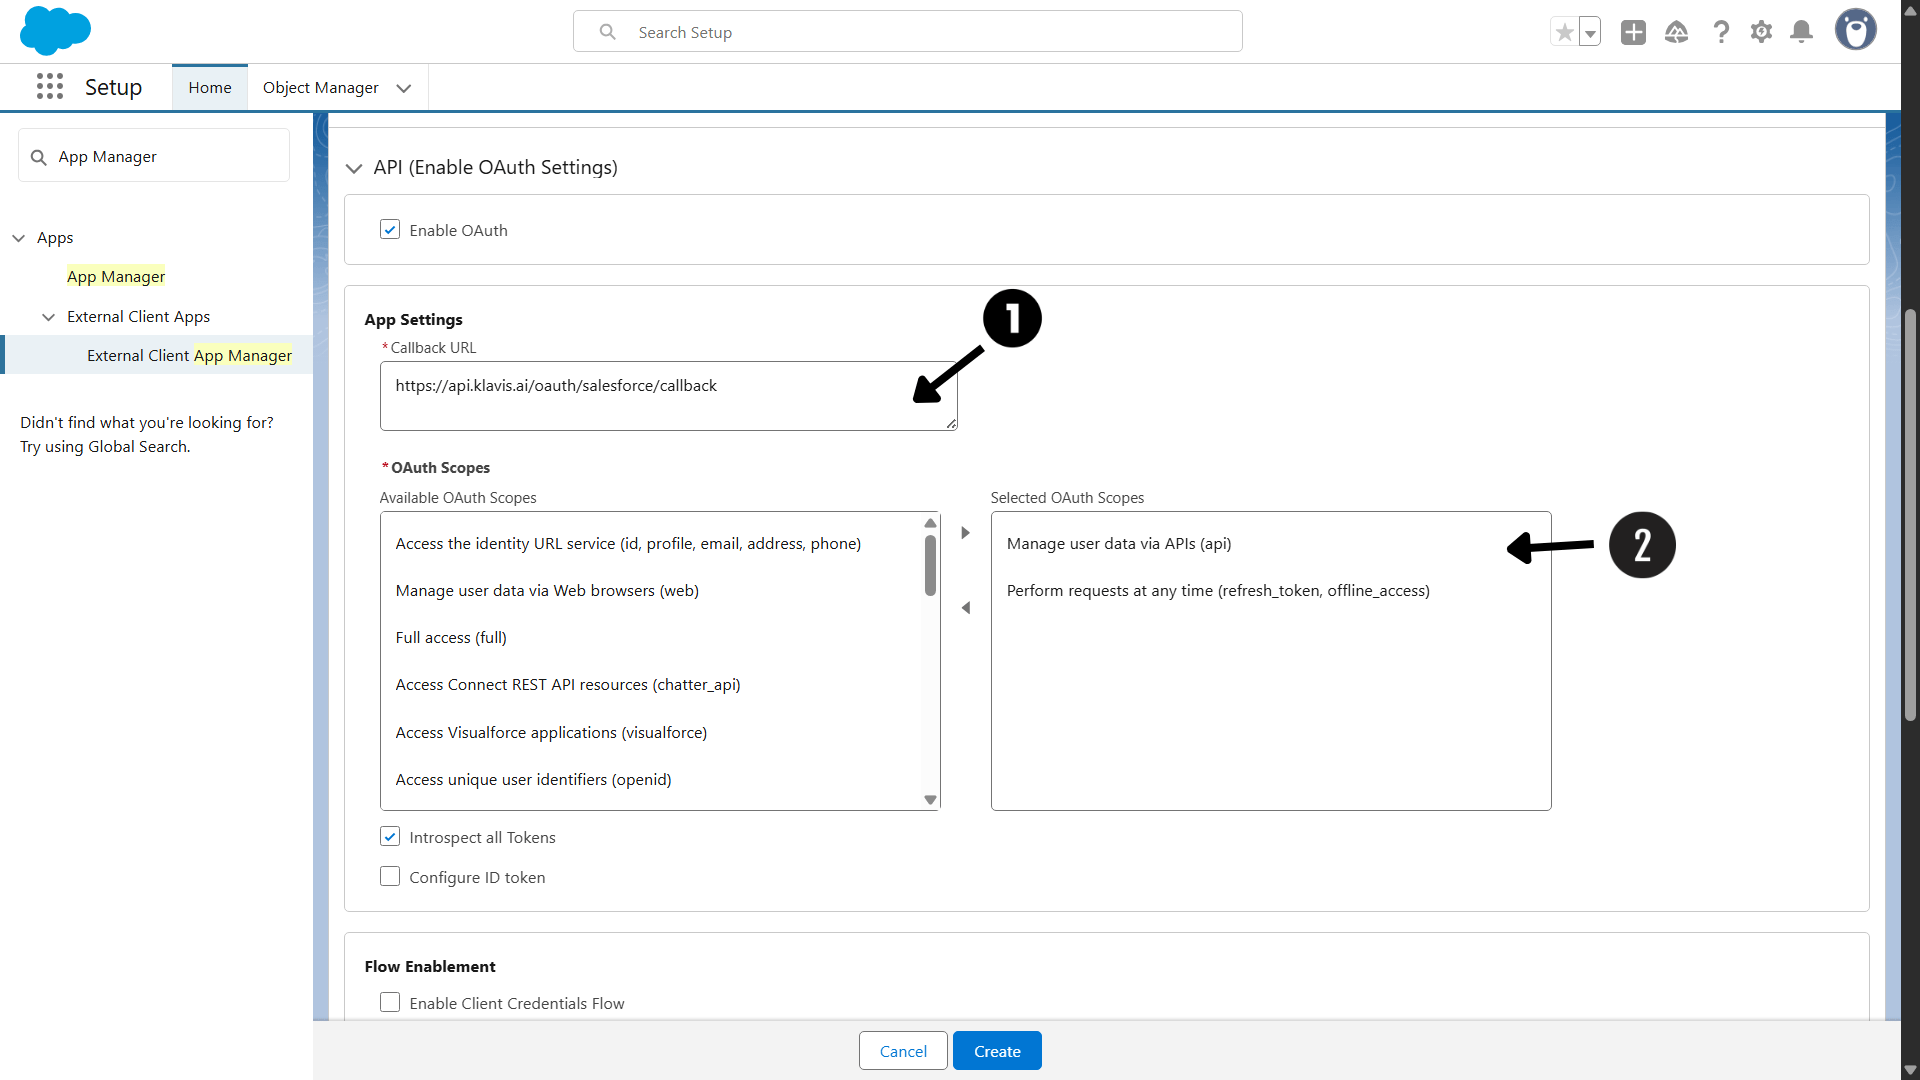
Step 4: Configure OAuth Settings
Klavis Salesforce MCP Server uses the following OAuth scopes:
api,refresh_token,offline_access-
Redirect URIs: Add your callback URL:
https://api.klavis.ai/oauth/salesforce/callback
-
Scopes: Move required scopes from “Available” to “Selected” Oauth scope menu:
api(required to manage user data via APIs)refresh_token,offline_access(required to perform requests at any time)
- Click on “Create” app
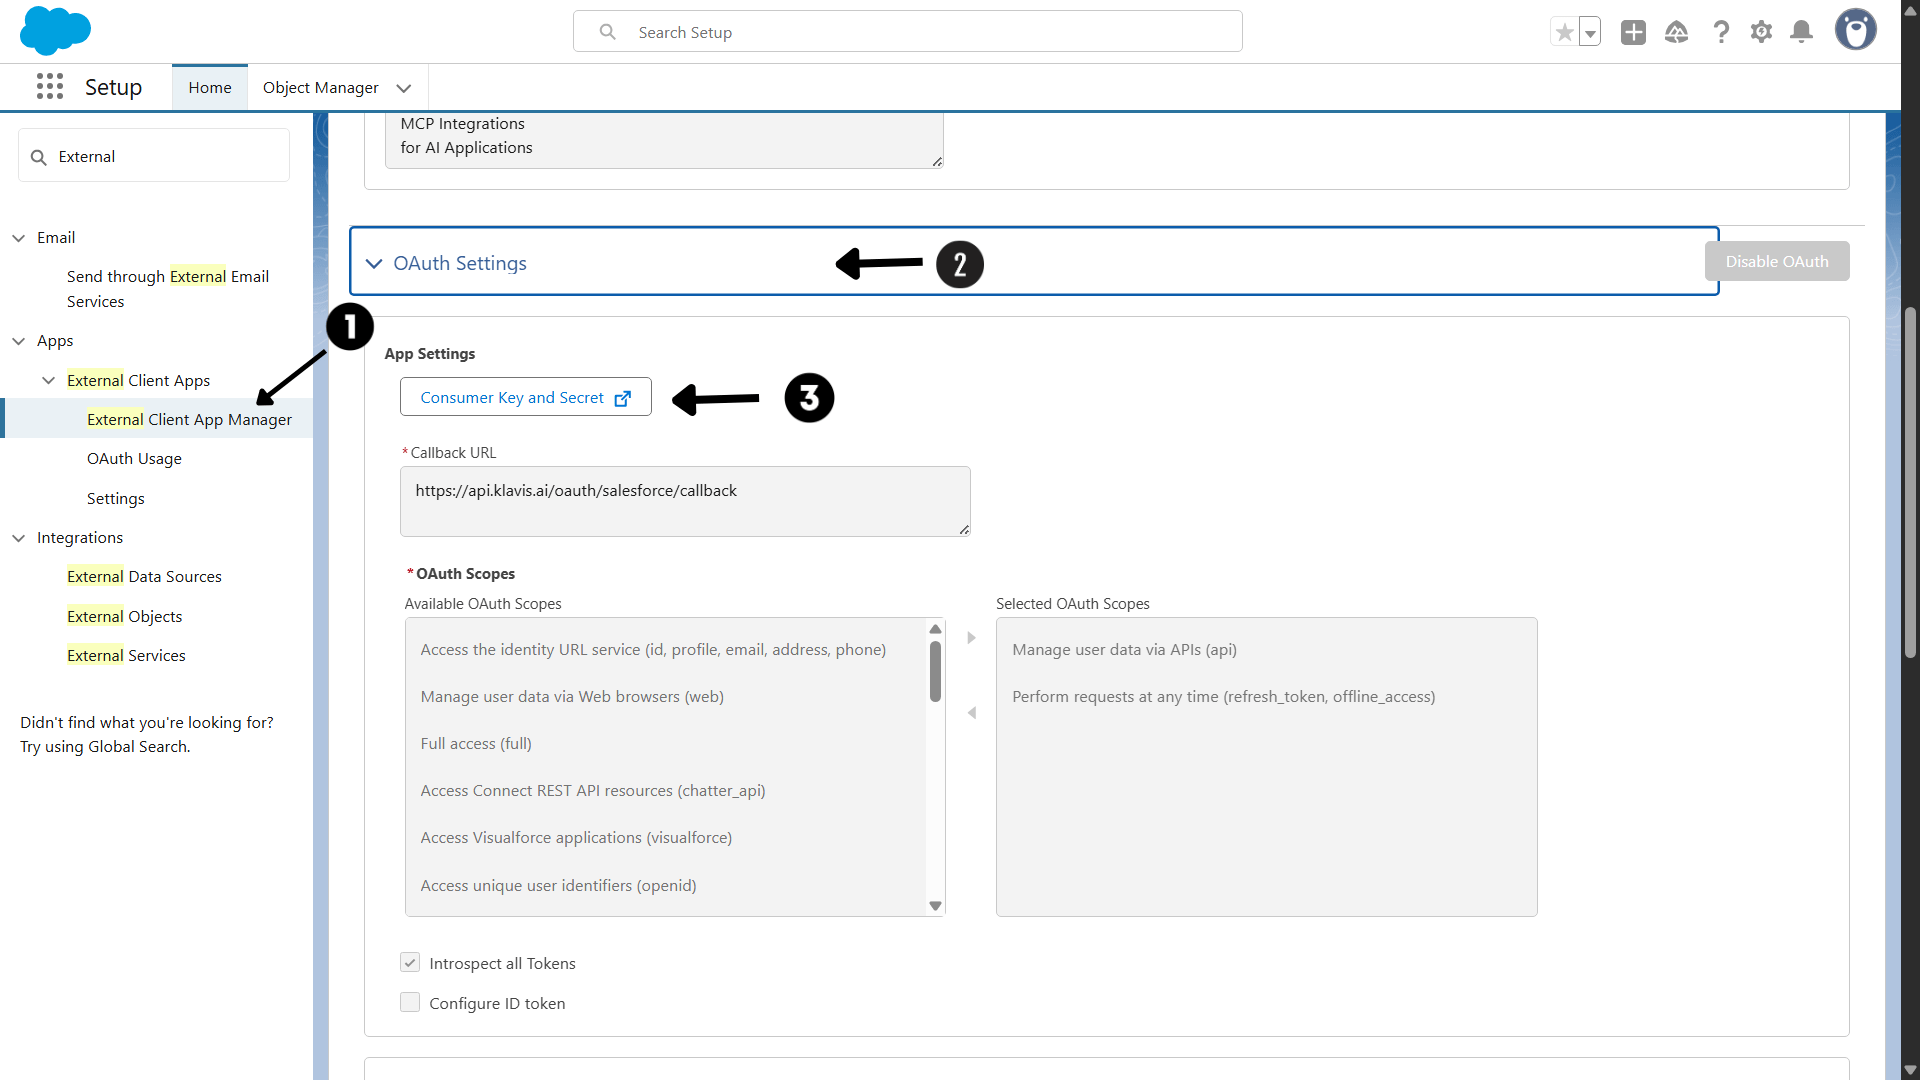
Step 5: Get Consumer Key and Secret
After creating the app, follow these steps to get the credentials.- From dashboard, go to “Setup Menu” (Gear Icon) and click “Setup”
- Search “External Client App Manager” in the “Quick Find” search box
- Click on App that you created. Navigate to Setting -> OAuth Settings
- Under “App Settings”, click on “Consumer Key and Secret”
- To access credentials, verify your identity using verification code sent to your connected mail.
- Copy Consumer Key and Consumer Secret from consumer details menu (keep it secure!)
Step 6: Get Remaining credentials (Security Token, Username, Password, Instance Id)
- In user settings, “My Personal Information” -> “Advanced User Details”
- Get Username from User Details section
- Use Password that you set while creating the account.
- Copy Instance ID from address bar or Login History -> Login Url tab
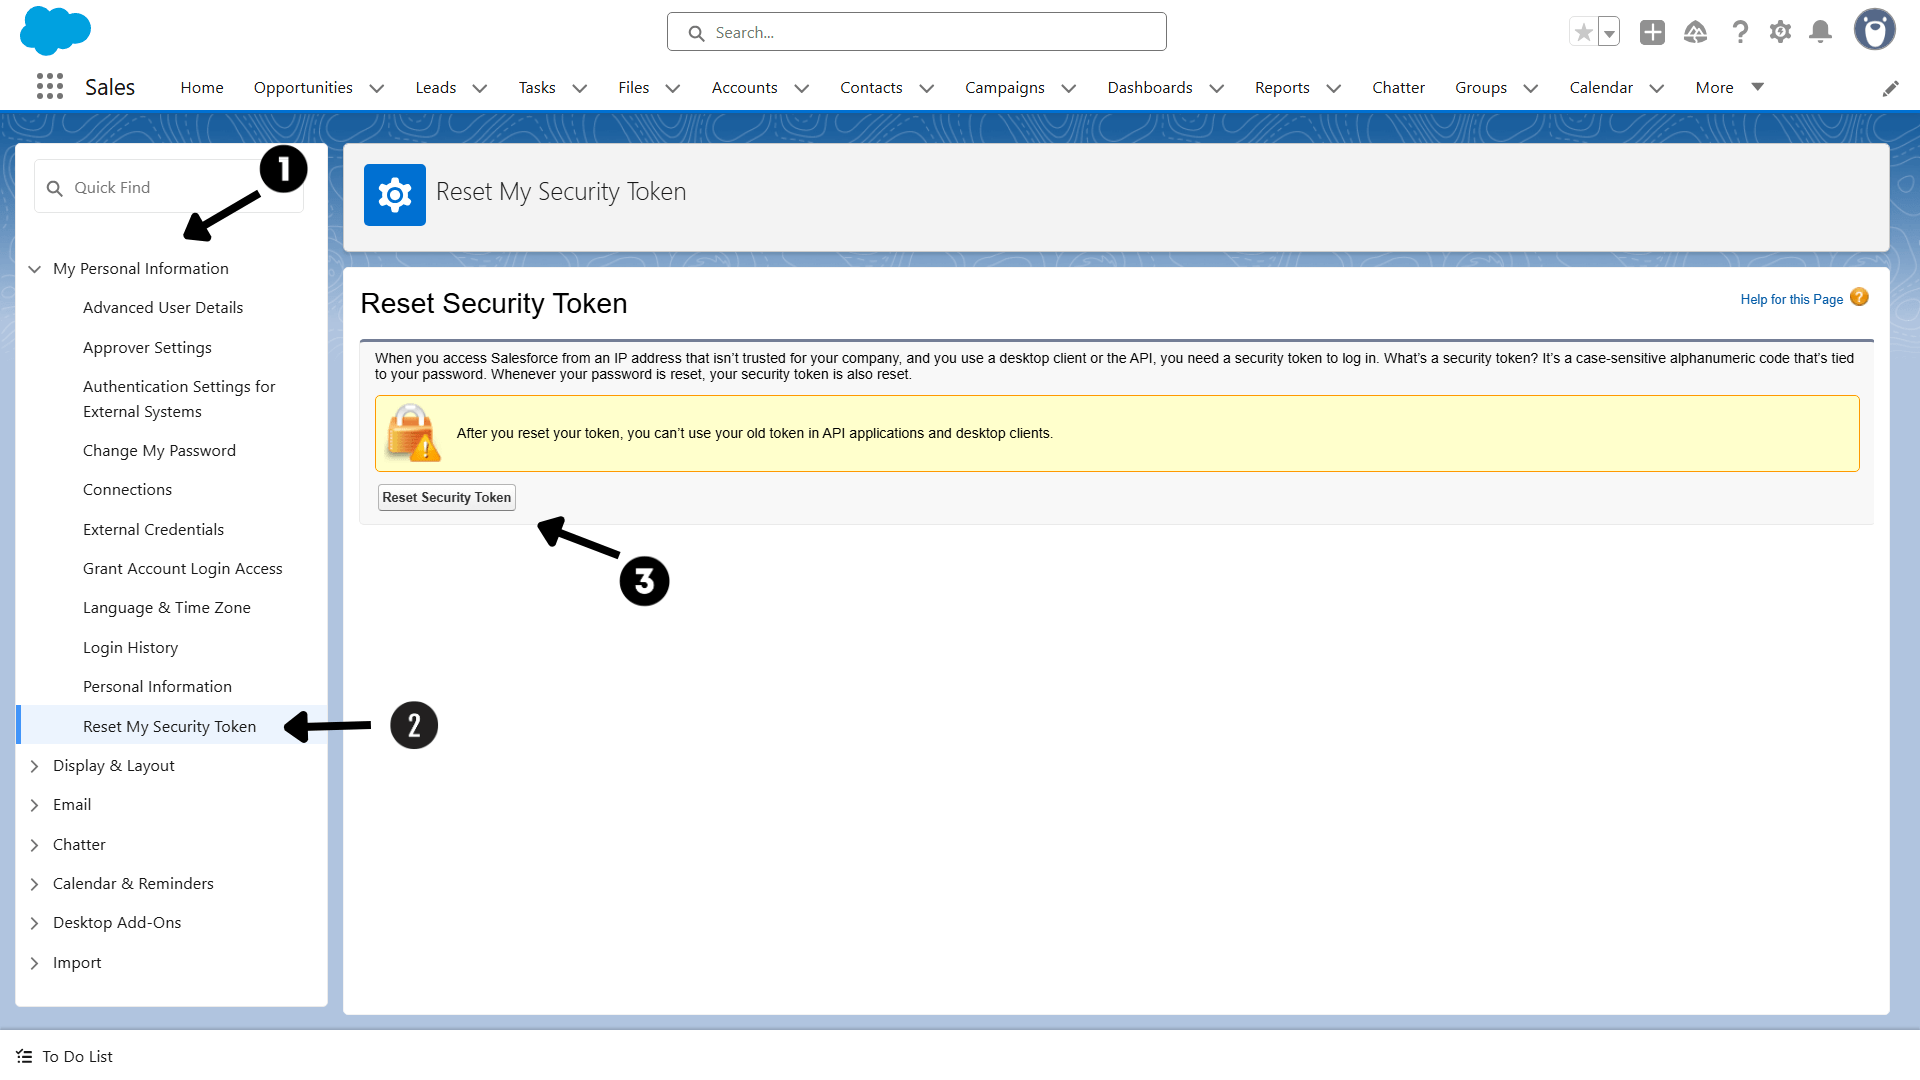
- Go to user setting, “My Personal Information” -> “Reset My Security Token”
- Click Reset Security Token
- Security Token is sent to you via mail (keep it secure!)
(Optional) Step 7: White Labeling
White labeling allows you to customize the OAuth experience with your own branding instead of Klavis AI’s.
- Configure White Labeling: Go to https://www.klavis.ai/home/white-label
- Add Your Credentials: Enter your Salesforce Consumer Key and Consumer Secret from Step 5
-
Set Redirect URI: Use
https://api.klavis.ai/oauth/salesforce/callbackor your custom callback URL -
Initiate OAuth: Use your Client Id when starting the OAuth flow:
For detailed white labeling implementation and code examples, see our OAuth & White Labeling guide.